Saturday, July 23, 2011

Just Us Girls {3-D/TEMPLATE} Challenge #94

Hi friends.  I'm here to share my JUGS 3-D/Template project with you.  Dana is our hostess this week and she selected a fun challenge that hopefully anyone can play along with!  Check it out:
Don't we all have some sort of plain gift bag laying around?  I have a ton in my collection of wrapping paper and gift cards.  I found this little, dark brown gift sack and I knew it was perfect for my project!  I kept my bag ultra simple to show you how easy yet effective a quick decoration can be on a simple bag like this one.  I already had some of Lauren's Spring Is Here paper printed from my last project, so I took the 5x7 piece and used a scalloped border punch on each long side.  I cut the left and right edges of my double sided scalloped layer to about 5 1/4".  I then scored down the middle and cut in about 1/4" on each side about 1" from the edge.  I kept it folded and cut from one slit to the next.  That gave me the opening I needed to slide the panel over my handles. 
I simply added two matching buttons from my stash, after threading with green twine and adhering with glue dots.  I added a triple loooped bow to hold my panel down, and I was finished.  It really doesn't get much easier than that...and Lauren's fabulous paper didn't need much to make it sing on this project!  It's such a lovely contrast with the dark brown...I couldn't bring myself to muddy it up any further.  My three wick candle fits snugly inside ready to give to someone when the occasion arises.
Well, that's all I have for you today.  I sure hope you can play along this week!  If you do, please add a direct link to your post using Linky Tools over on the JUGS blog, and use keyword JUGS94 in any online galleries.

Don't forget to visit our fab DT for some awesome inspiration!  Some of the girls are on break this week due to busy summer schedules, but please swing by and leave them some love anyway :]

Thanks for stopping by!  Hope you stay cool this weekend and find time to get a little crafty.

Wednesday, July 20, 2011

Color Throwdown #151

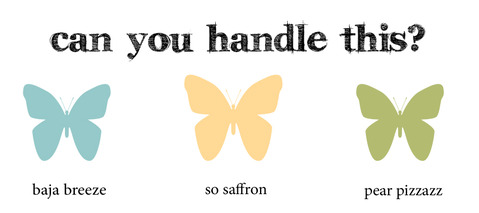
Hi friends!  I'm here to share the card I made and today's palette at the Color Throwdown, where I'm your hostess!  Check out the palette our team came up with:
As you can see, I chose to work with part of the palette, vs trying to use ALL of these pretty colors.  Laura's Rainbows and Clouds dies and stamps were our inspiration this week:
My chosen colors from the expansive palette came straight from Lauren's Spring Is Here paper.  Today was the perfect opportunity for me to finally use it!!  Isn't the combo purty?!  Love it!!  I cut the rainbow from my patterned paper found in the Fresh Cut Expressions Collection 2 set.  I layered it on my circle by adhering the three stripes with Scor-Tape on the reverse side (small pieces that spread across the three stripes in different areas).  I left the tape backing intact and added a few small pieces of dimensional tape. 
Now, I know my rainbow looks offset, but it's NOT!  I promise!!  The bottom edges of my rainbow are perfectly aligned...I just used the clouds as an optical illusion.  I offset them as much as I could without revealing the edges of the rainbow.  Cool effect, huh?  I layered my circle and rainbow on another piece of my Fresh Cut Expressions Collection 2 paper cut from Lauren's new label cut file, Be Dazzled.
I layered some Saffron ribbon and satin, 'gold' ribbon on top to thread through my label die and create a double looped bow.  Tied it down with a green button from my stash and finished everything off with dimensional tape ;]  EASY, girly card, for a very, VERY dear friend of mine, Kristin Daugherty.  It's her birthday today, so I wanted to whip up a late card for her (she knows me well, and doesn't expect to receive any cards on time from me :).  So, with any luck, I'll stick this in the mail tomorrow and she'll have it by Saturday.


Oh, and my layout was inspired by the very talented Chupa's Sketchbook Saturday Challenge #20.  Check it out:
That's all I have to share with you today, but be sure to check out the rest of the team.  Some of our gals are taking a break, and some are playing along.  I'm linking everyone because I know they all would appreciate a little love if you're in a commenting mood ;]  
Keva ~ July Guest Designer

Have a great week and weekend!!

Wednesday, July 13, 2011

Color Throwdown #150

Hi all, and happy Wednesday :]  I'm here to share a VERY quick card I made for the Color Throwdown challenge.  Laura is our hostess and she selected this pretty palette:
I used the colors quite literally, which I normally try NOT to do, but like I said...this was a quick card and I LOVED all of the colors together.  So, I decided to just go with it.  I cut the frame using the MTME Killer Curves cut file, and then embossed it with one of my Cuttlebug embossing folders (birds and vines...not sure of the actual name).  I tied a teal, satin bow around the right side and popped it up with dimensional tape on a 4.25"x4.25" card base.  
My flower was created by cutting the pieces from my Fluttering By paper using the Blossoming Into Spring cut file.  I only worked with four of the flower pieces for my bloom, but I popped all of them up with dimensional tape except for the base and the top layer.  Before I adhered them, I sponged a pale pink followed by a rose red and stitched a teal button to the top layer.  I adhered the flower to my card with glue dots...and as you can see, that's literally all there was to my card.  Simple, but fresh...and sentiment free so I can use if for a myriad of occasions that pop up.  


We hope you're able to find some crafty time this week and can play along.  Remember, you don't have to match these colors exactly, just use the closest colors you have on hand.  Also, be sure to add a direct link to your post using the Linky Tools widget on the CTD blog.  Last but certainly not least, check out our CTD gals for a healthy dose of inspiration today:


Thanks for stopping by, despite my MIA status recently :|  Hope your summer is relaxing and happy ♥

Saturday, July 9, 2011

Just Us Girls Challenges #91 & #92 :]

Ahhh...TGIF!  I'm back after several days of NO crafting :[  I've been engaged with lots of non-crafting stuff though, and it's all AMAZING, so I'm definitely not complaining.  I'll set aside crafting to enjoy life any day ♥  Maybe I'll share more on that another day...as things get even better...but for now, I'm going to share my JUGS92 card!  I'm your hostess this week for the Technique Challenge, and I'm challenging you to make a project showcasing your very own handmade paper buttons!
My button trial didn't work out so well initially, and I can't say I'm overly thrilled with this one but it is night and day better than the first!  I created my button using cut files instead of punches.  For this one, I used the MTME Elegant Curves - Circles cut file.  
I scaled the main layer to 1", and copied/pasted until I had five pieces.  I cut three out of SU Poppy Parade cs, and two out of white.  I added two small circles to the poppy pieces for my button holes, and added one larger interior circle to my white layers so that I would end up with a frame of sorts.  Here's a snapshot of what it looked like in SCAL:
After adhering the layers, I painted the sides with white acrylic paint to hide the poppy layers, and added a thick glaze (a little TOO thick) of Crystal Effects to the top.  Let it dry before touching the glaze otherwise you'll have to add another layer of glaze and you'll end up with the THICK layer I've got!
Check out the cutie-patootie rainbow and cloud pieces!!  These clever little images (and sentiment) are courtesy of Lil Inker - Rainbows and Clouds Dies and Stamps.  Laura is so talented...she never fails to amaze me with her new products.  Her eye for versatility and what the market is lacking, is phenomenal.  I love watching her humble company grow with each release and can't wait to see where this takes her :]  If you LOVE her products as much as I do, and you're looking for a temporary design team gig...check out her DT call!  You'll be a part of the very beginning if you get picked up AND you'll receive at least two of her current release products!  Win-win if you ask me!!
I cut my rainbow from four different sheets of my MTME School Plaid, and added a strip of the poppy to the top of my card.  I used Kathryn's sketch from last week's challenge (JUGS91) for my layout.
That's pretty much all there was too it other than some sponging and embossing.  Be sure to swing by the rest of the DT's blogs for a ton of inspiration this morning.  They turned out some gorgeous cards!!


♥ Christina ~ July Featured Designer ♥

Thanks for stopping by today!  Hope you are enjoying this HOT summer and finding some time to get creative. Have a fab weekend.

Wednesday, June 29, 2011

Color Throwdown #148

Hi friends!  I'm popping in to share my Color Throwdown card for this week.  Bar is our hostess and she chose an unconventional palette, that actually works beautifully together!  Check it out:
I shied away at first, but then a light bulb went off and I envisioned my very simple-in-appearance card.  I made the flower using the new Rainbows and Clouds die from our very own Lil Inker, Laura Pryor.  I decided to use the small and large arches from the small rainbow to create 6 petals.  I cut the arches from the free coral paper I created for the CTD.  You can still download it HERE :]  
I basically used one glue dot per "petal" and adhered them to a 1" circle.  I hot glued the button to the center to help firm up the bloom.  I added the MTME Branching Out cut file (trimmed into two pieces) for some foliage (and to use Garden Green :), and stamped the sentiment from the Lil Inker Rainbows and Clouds Sentiments in Pacific Point.  That's all there was to it other than cutting/layering my top panel and rounding the corners.  I popped it up on dimensional tape, and my card was done.
We certainly hope you'll take on the challenge this week and help to show everyone how well these colors work together!  If you don't have these exact colors, just use the closest you have.  Be sure to post a direct link to your project over at the CTD blog and use keyword CTD148 in any online galleries!  Before you get started, swing by our CTD gals' blogs to check out their inspirational projects!!
Betty Wright ~ June Guest Designer

Thanks for stopping by today.  Hope you're having a fantastic week!

Sunday, June 26, 2011

SURPRISE Birthday Blog Hop for Katie Cotton!!

Happy Sunday, my friends.  I'm here today to help surprise the very sweet, multi-talented, Katie Cotton as part of her birthday blog hop!  Tangii is the mastermind behind it all and I didn't hesitate for a second when I read her email inquiring about who wanted to take part.  Katie is AWESOME!  One of the nicest people in blog-land ;]  I typically refrain from shabby cards because I don't execute well...they usually just end up looking messy.  BUT, today I decided I'd give it a go...I was just feeling shabby I guess :]  I LOVE how it turned out!  I don't think it's perfect, but that's the point, right? Keep it kind of abstract and piled high with goodies?! 
Katie seems girly to me so I went with some pinks and some neutral browns.  My stamps came from four different sets:  Birthday = Sentimental Occasions; Wishes = So Sentimental; to you = Just For You; and the flourishes = Fanciful Flourishes.  I cut my sentiment panel and base from my Occasional Label cut file. 
The pink, pearl flourish is from Prima, the metal swirl is from SU Hodgepodge Hardware, lace ribbon is May Arts, satin ribbon is from Michaels, button is from my stash, multi-colored twine is from the jewelry section at Michaels, and the flowers are also primas.

I distressed my edges and use some Ranger Ink sponge daubers to add white acrylic paint.  The patterned paper is from my Wistful Wonder pack and my Wistful Musical Magic pack.  I stamped flourishes on my Soft Suede cs in the same color ink.  My layout was inspired by Mojo Monday's MOJO196 sketch.
So...that's all there was to it :]  Here's wishing you a very HAPPY BIRTHDAY, MS. KATIE!!!  Big birthday cyber hugs to you, girly!  Hope it's awesome.

Now, for the rest of you, we would love for you to hop along to each designer's blog to leave some love ending with the birthday girl, then make a birthday card for Katie and add it to the hop!  Check out the master list:
Thanks for popping in!  Have a happy Sunday.

Saturday, June 25, 2011

Just Us Girls {3-D/Template} Challenge #90

Hi friends!  I'm here to share my JUGS project just a wee late this time.  I've been MIA this month with family in town, a college visit, and my daughter's graduation festivities...but I'm trying to get back in the saddle ;] Maria is our hostess this weekend and she challenged us to create a 3-D project or template with a patriotic theme.  I immediately leaned toward the MTME Star of the Show template for my project (as did Lisa, I noticed this morning!  Great minds, I tell ya!).  
I used some of my basic patterned paper from the Dotted Stripes Collection 2 and Collection 3 for my project.  My printer ink was waning, but I loved the rustic look it gave to my template so I went with it!  I'm so bad when it comes to enhancing a rustic, or vintage look because I refrain from distressing or sponging.  I probably should have done one of the two with my project, but I just couldn't bring myself to do it :]  So, it is what it is.
I adhered some white lace May Arts ribbon to the lid alone, and used some navy satin ribbon to tie my box closed.  My Killer Curves cut file came in handy once again for my sentiment.  I used the "Friends are like stars...you don't always have to see them to know they are there" sentiment from the MTME Keep Strong set for my focal point.  This will make for a fun way to package up some goodies for a friend who helped me out tremendously with Tia's graduation party!  I think I'll add some sugar free chocolate covered blueberries as my gift...just need to swing to Trader Joes and pick some up :]
If you're wondering how I was able to sponge the interior circle on my sentiment, it was really quite easy.  Just cut two center pieces of the Killer Curves cut file, but center a circle sized to your liking to one of them before cutting.  It'll look like this on your cutting mat:
Then, just layer the frame on the panel you want to sponge, hold it in place, and sponge away!  Easy stuff.  You can also store the frame for future sponging like I do to save paper.
Alright friends, that's all I have to share today, but swing by in the morning for another special projects :]  Be sure to check out the goodies that our JUGS gals came up with as well!  They made some CA-UTE projects today!
♥ Rosemary ~ June Featured Designer ♥

Thanks for swinging by today!  Hope your weekend is off to an awesome start!!

Wednesday, June 22, 2011

Color Throwdown #147

Hi friends!  I've been MIA this past week getting ready for my daughter's high school graduation and party...and visitors, and my boss's retirement ceremony!  Lots of stuff going on and I just needed to focus on my kiddo :]  But, I'm back to host this week's CTD challenge!!  Broni shared a cool color inspiration site with us weeks ago that extracts colors from vibrant photos.  I loved several of the palettes, but settled on this one for today's challenge:
For my card, I obviously honed in on the black and pink, but I promise I used Sage Shadow and Cherry Cobbler!  Both colors are in the patterned paper...hard to see, but they're there - I swear!  I recolored my Serenity MTME paper for my card, and also used a sheet from my Fun and Fortune pack.  
I used my Killer Curves cut file and the Gratitude stamp from Bold Botanicals.  The black trim is from Hobby Lobby, the ribbon is Stampin Up, and the black hemp twine is from the jewelry section in Michaels...button is from my stash.
This is the first of many thank you cards I owe to friends and family for helping me TREMENDOUSLY in preparing for Tia's grad party.  I'm very blessed to have such helpful, considerate, selfless people in my life ♥  My layout was inspired by the MTME Pretty Patterns sketch (MTMEPPS14).
Okay, so now it's your turn to get busy with my palette!  We'd love to see your interpretation of these colors this week.  Just post a direct link to your card over at the CTD blog and use keyword CTD147 in any online galleries.  I'll be by to check out the goods!!  Before you get started, swing by our CTD sister's blogs for some inspiration.
Betty Wright ~ June Guest Designer


Thanks for stopping by today!  Hope you're having an awesome week :]

Wednesday, June 8, 2011

Color Throwdown #145

**Updated post 6.8.11 @ 10:30** WARNING!  This is a QUICK POST but I will update it appropriately first thing in the morning...we got home around 9:30 from our Penn State trip, so I'm whipped!  Thankfully I started my card on Monday before we headed out of town.  Laura is hosting for Carole this week, and this is the fun palette Carole selected:
I kind of cheated and went with Soft Sky vs Baja Blue.  Close enough though :]  I finally used my MTME Buzz-y Blooms digi paper, and I paired it with one of my very first cut files, the daisy from Flutters and Flowers.  The leaves came from the same cut file set.  I punched my saffron border using an EK Success border punch.  The Happy Birthday sentiment is from my Sentimental Occasions stamp set.  You may have also noticed that I changed up my hand-stitching on this card (I normally cross stitch or make a "v" pattern)...here's a close up.  I like how it turned out!
...and here is a close up to show that there is a "Happy" to go with my "Birthday" sentiment ;]  It's just hiding under my ruffled trim.
The Mojo Monday (MOJO194) sketch was the inspiration for my layout...and a couple other CTD gals!
Okay, swing by the CTD gals' blogs and check out their stunning projects.  
♥ Betty Wright ~ June Guest Designer ♥

Hope you're having a great week, friends.